Over/Under Axle Flip
All images were created by us, unless otherwise noted, so please respect our right to them and do not duplicate them in any way without permission - all images should be considered as copyrighted.
Why Flip your Axles?
What is "flipping the axles"? Like many things, it's a bit of a misnomer, but instead of making a case about why that's so, we'll just stick with what really matters. Many trailers - especially smaller trailers - come with under slung axles - the spring is mounted under the axle. This results in a trailer frame that is lower to the ground than a trailer with over slung axles. Flipping the axles
Under slung mounts have the spring mounted below the axle and over slung mounts have the spring mounted on top
There are two major reasons why many RV owners need to flip their
axles:
1. The trailer drags on driveways and other sharp inclines and dips.
Raising the ride height of the trailer will increase the ground
clearance at the rear of the trailer and eliminate or reduce the
dragging.
2. Owners of 5th wheel trailers may need to raise the trailer so it is
level when hitched to their truck. This is prevalent with 4X4
trucks, especially the later models as they seem to be several inches
taller than the older model years.
So what are the pros and cons of flipping the axles?
Pros:
- Improved trailer ground clearance
- Level trailer when towing
- Increased clearance between pickup bed and trailer
Cons:
- Raised Center of Gravity (CG) reduces trailer stability
- Increased sensitivity to cross winds
- Increased aerodynamic drag - lower MPG
Generally, lifting a trailer does not create any significant safety issues. However, one needs to remember that raising the Center of Gravity and increased sensitivity to cross winds WILL make the trailer less stable. This is a potential safety issue, especially for tow vehicle/trailer combinations that already tend towards instability. In other words, if you are having ANY issues with trailer sway or the trailer overpowering the tow vehicle, you need to eliminate those issues before proceeding with this modification.
NOTE: The official instructions for the Dexter kit can be found on there web site here.Step-by-Step
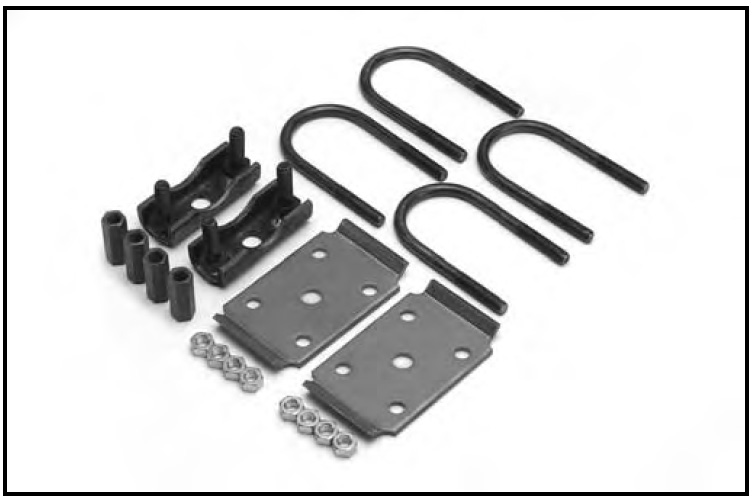
1. Order the Parts
At a minimum, you'll need the Dexter Over/Under kit. There are two different kits depending on axle diameter. The kits include everything necessary for the basic axle flip, however there are some other parts you might want to get while you're at it.
-
Long nuts for U-bolts. See below for why I use long nuts instead of the supplied nuts.
-
Shock absorber mounts. If you already have shock absorbers, you will need to weld new mounts to the frame to make them fit after flipping the axles. More about why here. Dexter Part # 033-029-00.
-
Equalizers. This is the perfect opportunity to replace the OEM cast iron equalizers with cushioned equalizers. There are several types available. We prefer the Dexter EZ Flex because they are simple, effective, economical and the complete kit also includes heavy-duty shackles and wet bolt kit with bronze bushings.
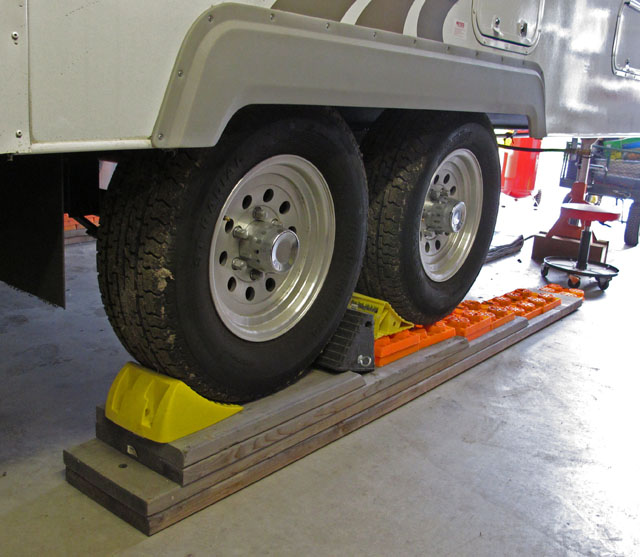
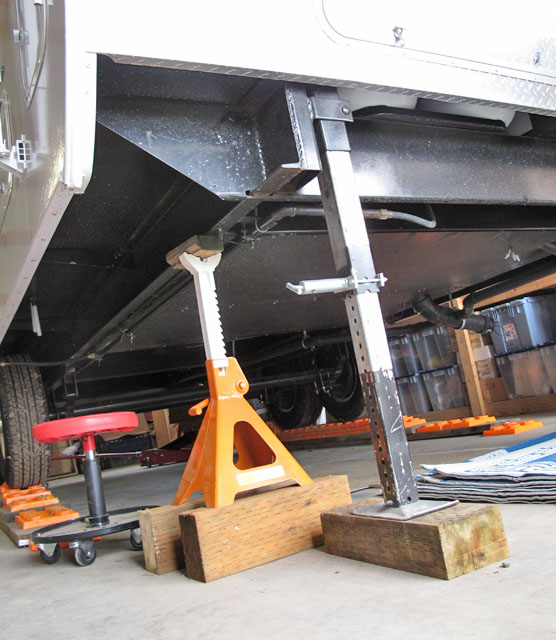
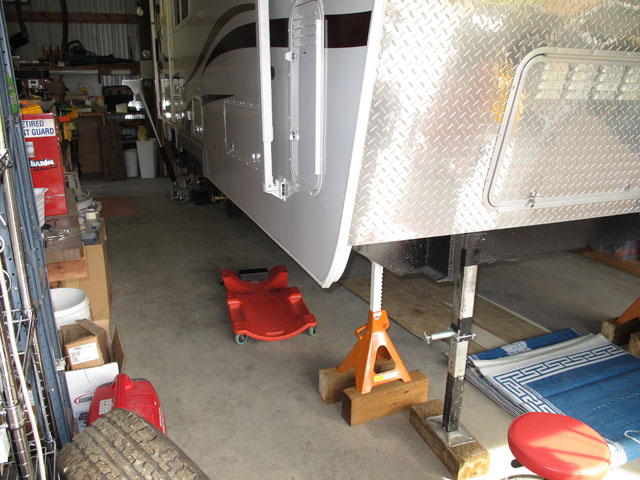
2. Raise trailer & place on jack stands
Since you are going to be lifting the trailer nearly 6", you will need to start by lifting the trailer more than just getting the wheels off the ground. If you don't, you'll have a hard time getting the wheels back on when you are done. It's easier to drive the trailer onto a stack of 2x12's than it is jacking it up that extra 6". Plenty of wheel chocks prevent the trailer from rolling or shifting - always think safety.
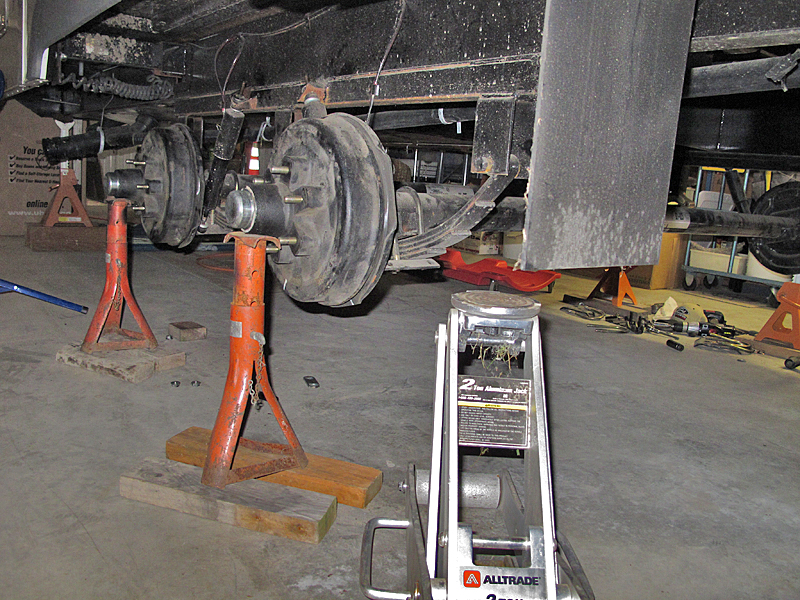
Note how we're using 2 - 3000# floor jacks to lift the rear frame of the trailer. Since our stabilizer jacks fold completely shut, I was able to use them as jacking points - that solved the problem of dealing with LP lines on both frame rails.
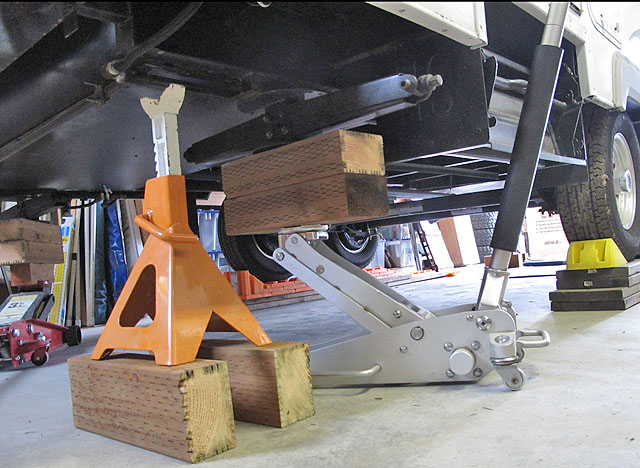
Once the trailer has been jacked up high enough to remove the wheels, properly support it with heavy-duty jack stands. Be very careful how you place cribbing (blocks of wood) to support the jack stands and/or extend the reach of the floor jack. We use pressure-treated 4x6's cut to 18" lengths for cribbing.
Since we're doing this on a 5th wheel trailer, we get to use the trailer's front jacks to raise the front end. We still needed some cribbing under them to get enough height. Don't trust the front jacks - set up jack stands and lower the front just enough to put a good load on them. Note the 2x4 under the frame rail because of the LP line.
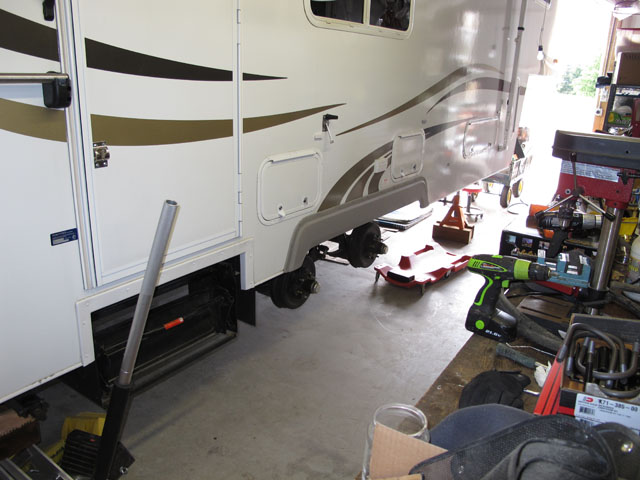
Now, it's time to take the wheels off and remove the wooden ramps.
The good news is that I get to work indoors. The bad news is that it's still a bit crowded with the work benches, tool boxes and tons of junk that live in our barn.
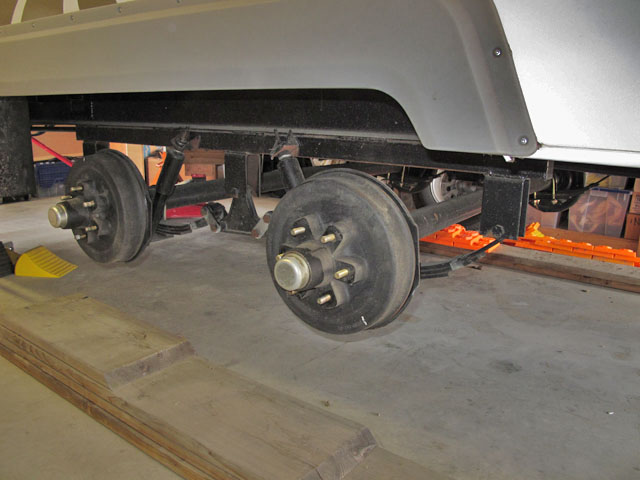
3. Examine the Suspension
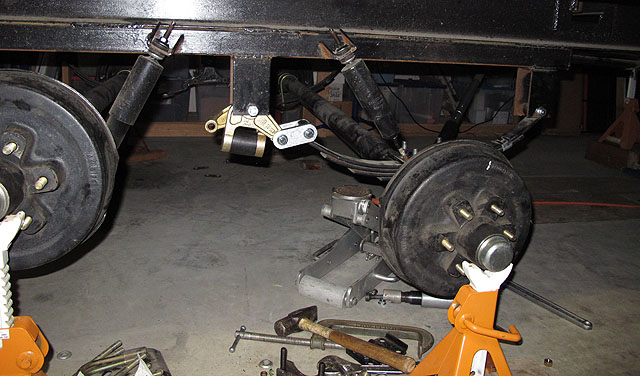
Now that we have the trailer safely supported and the wheels off, lets look at the suspension & ID the various parts.
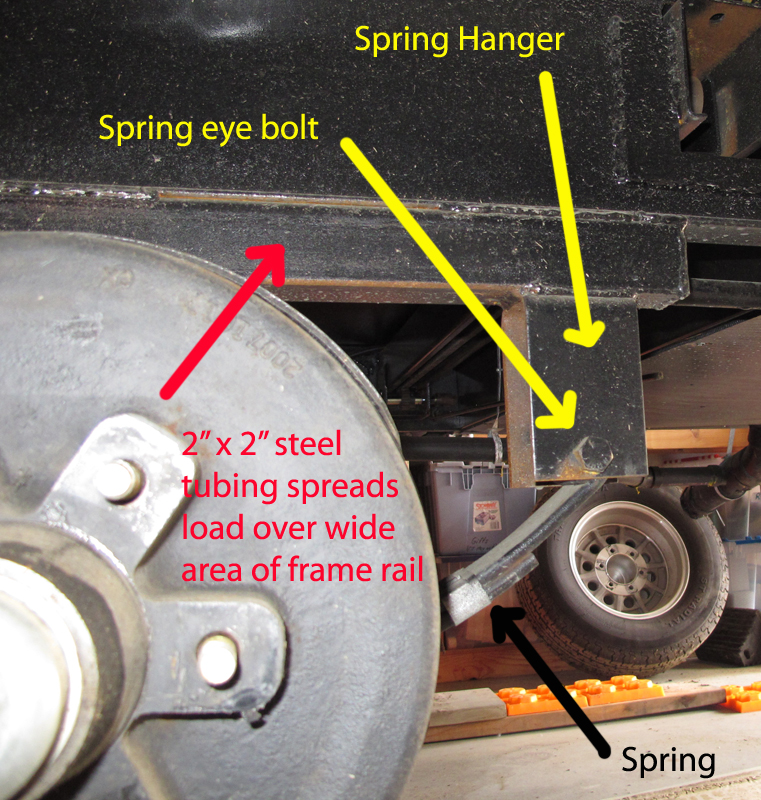
Starting in the front, we see the spring is bolted to a spring hanger which is welded to the frame. In this case, our Arctic Fox has a steel tube welded to the frame so the loads on the spring hanger are spread out across a wide area of the frame rails. This helps prevent the frame rails from buckling, bending or cracking at the spring hanger; something that's all too easy to happen when a trailer hits a big bump like a speed bump. The rear spring hanger is identical to the front.
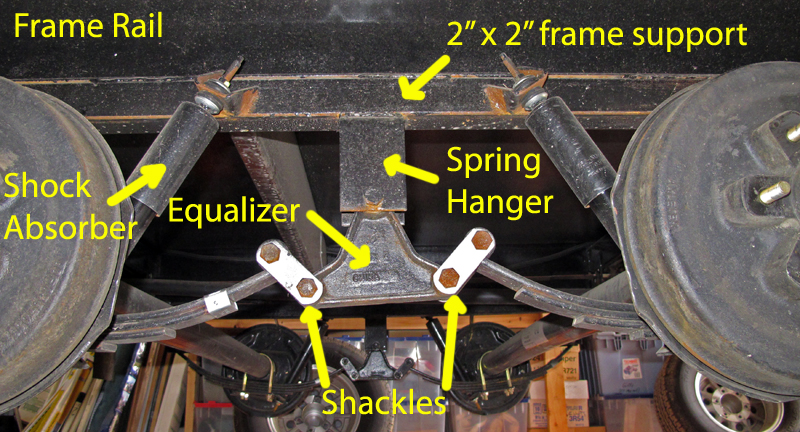
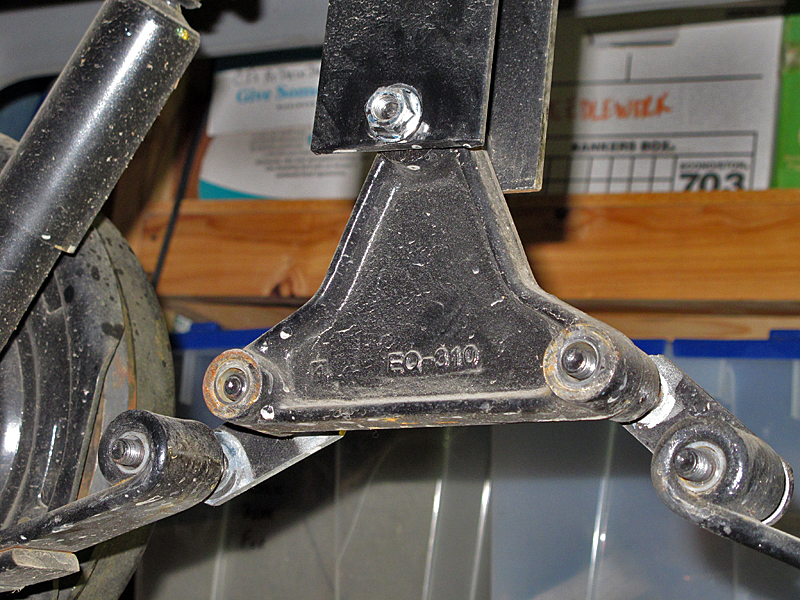
This photo shows the spring attachment via an equalizer mounted on the middle spring hanger. The equalizer teeter-totters on its upper mounting bolt. That allows the wheels to travel much further vertically than they could with just spring flex. The equalizer also helps equalize the load between the axles when one wheel is going up over a bump. Without the equalizer, the load on the axle going over a bump would be much greater than the load on the axle not going over the bump - one of the advantages of steel spring suspension over Torflex suspension.
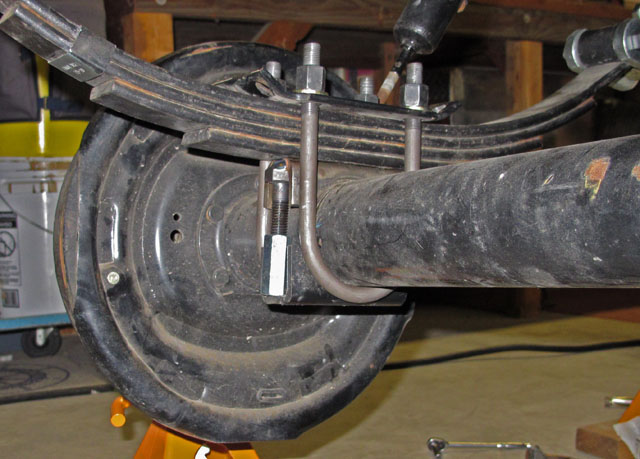
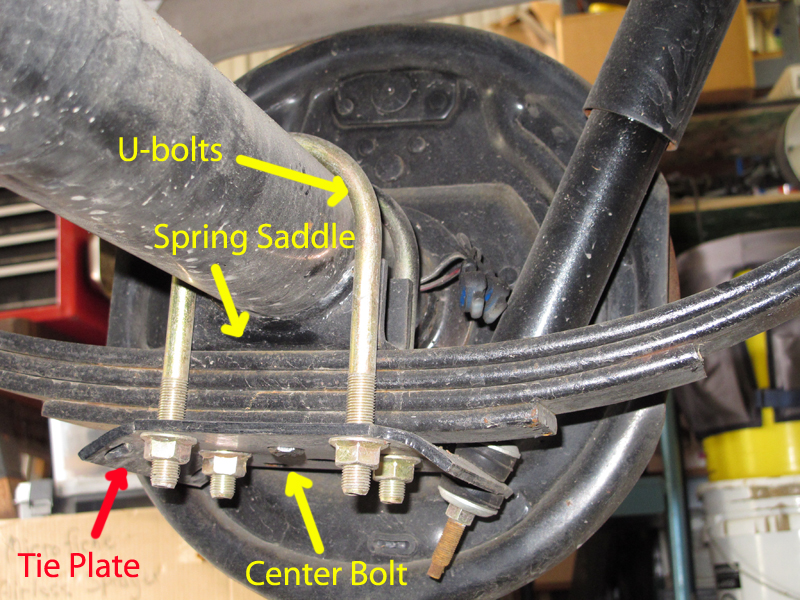
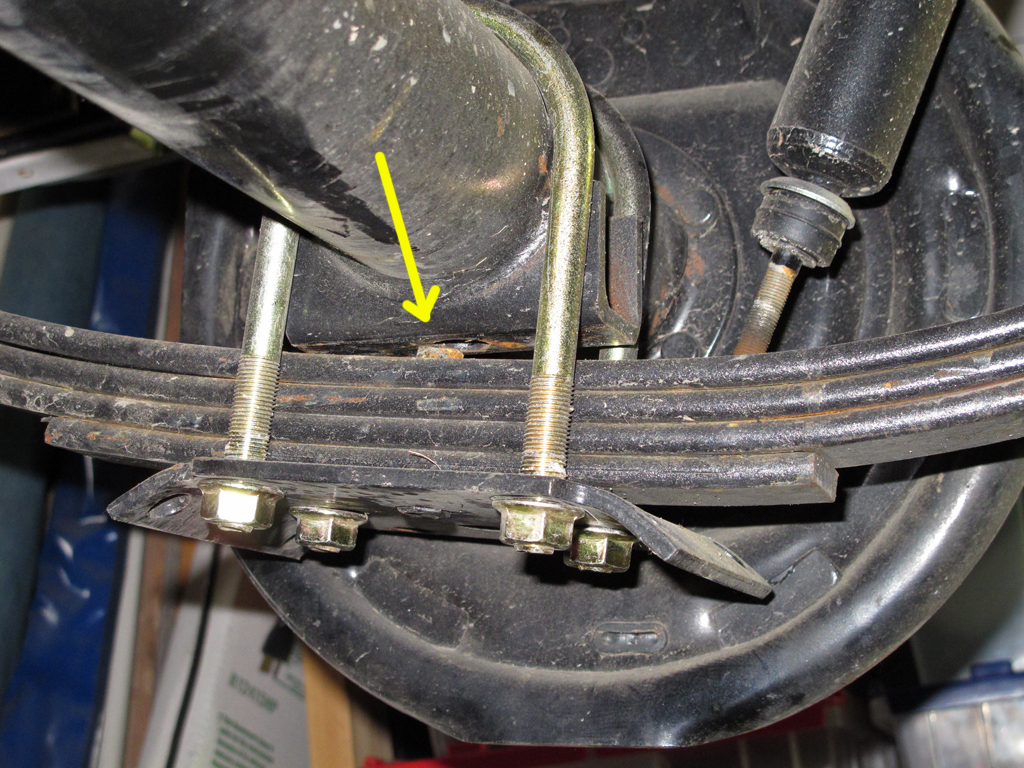
Looking at how the axles are mounted on the springs, we see the round axle has a spring saddle welded to the axle tube that sits on the relatively flat leaf spring. U-bolts clamp the axle to the springs through a tie plate.
The next step is to place 4 more jack stands under the axles & remove the springs.
NOTE: Be careful to not pull on the wiring to the electric brakes. You may need to loose a bracket supporting the wiring cable.
4. Remove the OEM Components
We started by loosening the U-bolts at all four corners. Only loosen the U-bolts slightly at this time.
NOTE: We will work on only one side at a time. That allows the other side to hold the axles steady so they aren't rolling off the jack stands or otherwise flopping around and making life difficult.
Pick a corner to work on first - I like to start with
the right-front corner (curb side front) because there is more room in the
barn around that wheel. Sort of like having dessert first.
![]()
Loosen the U-bolts further on only that corner.
NOTE: Spring center-bolt has come out of the hole in the spring saddle (arrow). You will need to make sure the center-bolt is properly positioned in the spring tie plate later when reassembling.
Next we loosened the nuts on the spring eye bolts at the hangers as well as the equalizer.
This photo shows all nuts removed from the spring eye bolts at the equalizer & the inner shackle removed.
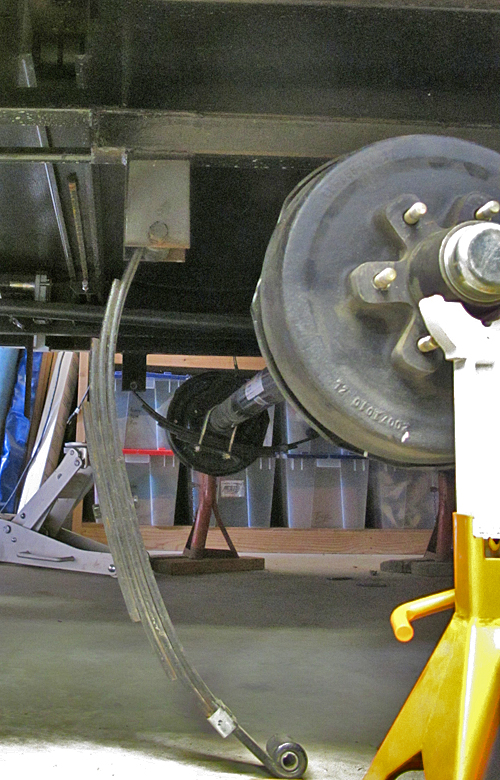
Now, the U-bolts can be removed completely, then the outer half of the spring shackles and the spring lowered - it will hang on the hanger end.
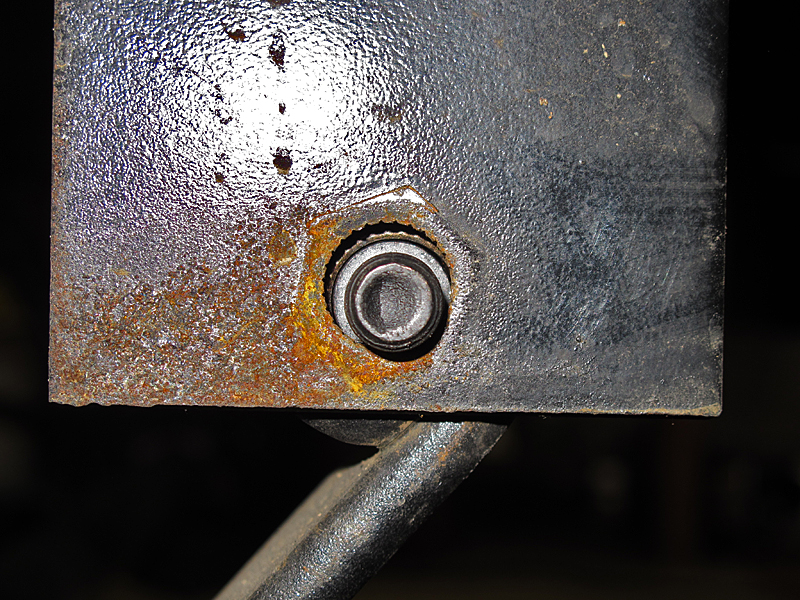
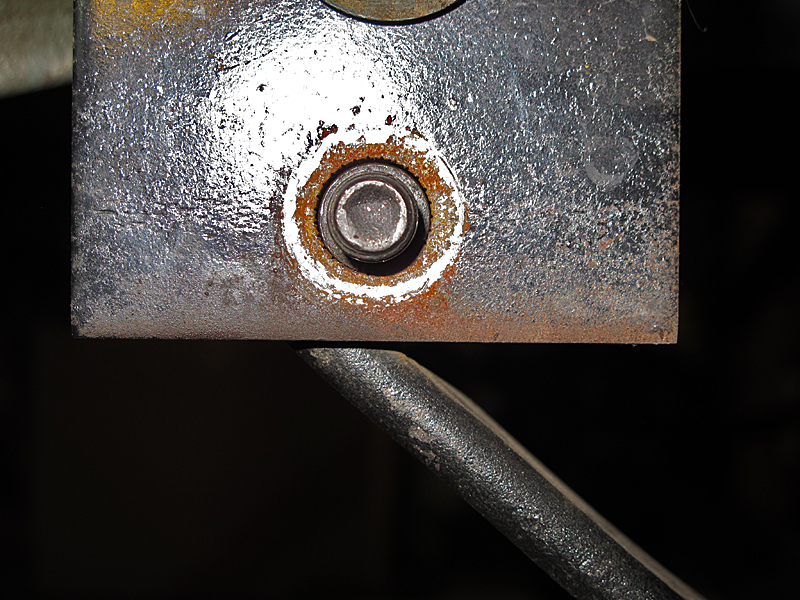
There are serrations on the shoulder of the bolt that prevent the bolt from rotating in the spring hanger. The serrations can also prevent the bolt from being removed easily.
The trick to removing a stubborn bolt is to thread a nut on it so the end of the nut is flush with the end of the bolt threads. Have a helper hold a heavy hammer tightly against the spring hanger while you persuade the bolt to come out with a smaller hammer against the nut threaded on the bolt's threaded end. FYI: the nut protects the threads. This works best using a sledge hammer against the hanger to keep it from flexing and a brass hammer on the nut to minimize damage there. Occasionally, I've had to resort to an air hammer - brrrt! and the bolt pops out and flies across the shop.
5. Dexter EZ Flex Option
We replaced the OEM cast iron spring equalizers with Dexter EZ Flex equalizers at the same time. The EZ Flex Equalizers add a rubber cushion to help takes some of the harshness out of the ride. The complete kit includes HD shackles and wet bolts (greaseable) which is a great deal and much better than the Delrin spring eye bushings that wear out quickly.
Our Arctic Fox 24-5N came with tall equalizers. As a result, replacing them with the standard height EZ Flex equalizers will drop the trailer about 1".
Note the grease fittings on the center mounting bolt of the EZ Flex equalizer.
If you don't have any of this stuff, stop right now and go get some from your friendly auto parts store.
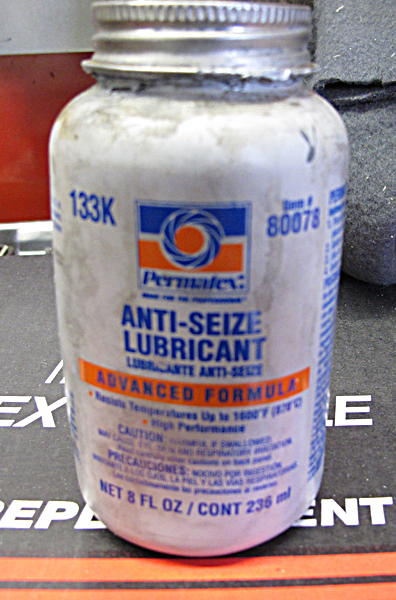
While grease will lubricate the equalizers, we've had problems persuading the mounting bolt to come out after a few thousand miles of unpaved Arctic roads. My guess is that rust forms between the bolt and steel bushing in the equalizer. My solution is to pre-lube the equalizer bushing with anti-seize. This is not necessary on the bronze bushings at the ends of the equalizer.
6. Replace Spring Eye Bushings
If your springs have Delrin bushings (white plastic) now is a great time to replace them.
You have two choices:
-
Continue using the Delrin bushings. This is the easier, softer way. For now. The bad news is that they'll be worn out in a just a few years at best.
-
Upgrade to bronze bushing. If you got the Dexter EZ Flex complete kit, new bronze bushings came in the set.
Replacing bushings is usually easy, but can be challenging when Murphy is looking over your shoulder. Replacing plastic bushings with plastic bushings is almost child's play. Upgrading to bronze bushings can be more difficult.
-
Buy a long bolt at the hardware store that fits nicely inside the new bushing.
-
Slip the bolt through the new bushing & then into the old bushing that's still in the spring eye.
-
Tap the bolt head with hammer & watch as the new bushing goes into the spring eye, shoving the old bushing out in the process.
Tips:
-
Clamp the spring in a vise
-
Put a thin coat of anti-seize on the new bushing
-
Use a long bolt through a larger diameter pipe or deep socket and a nut to draw the new bushing into the spring eye

The drawing below should help illustrate the gist of the process.

7. Reassembly
Next, hold one end of a spring in the hanger and insert the new bolt.
NOTE: if you have wet bolts, be sure that the grease hole in the bolt faces fore or aft, but not up or down. This allows the grease to flow better when lubing the bolts later.
NOTE: The weight of the spring pulls the end of the bolt down and the shoulder is not lined up properly with the hole -- no good.
Move the spring around until the bolt lines up properly before persuading the bolt back into the spring hanger. That brass hammer is an excellent persuading tool. Once the serrations have started to go into the hanger hole, it helps to put a nut on the bolt threads and tighten gently. The combination of love taps from the brass hammer and gradual tension on the nut should push/pull the bolt in easily.
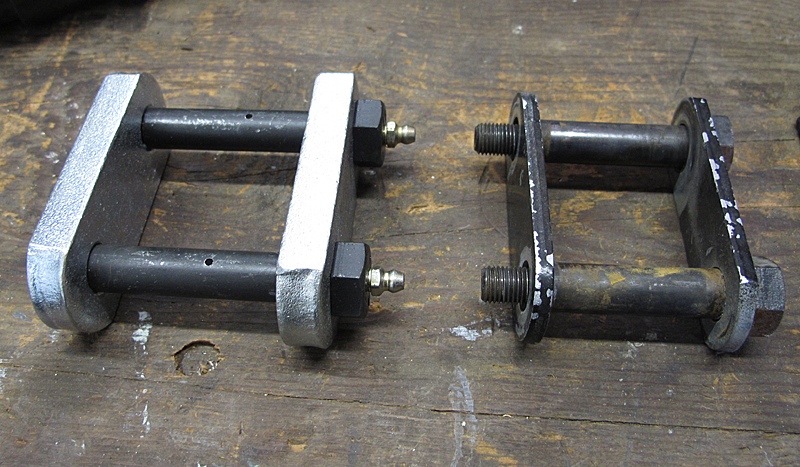
One of the benefits of getting the full Dexter EZ Flex kit instead of just the equalizers is the heavy-duty spring shackles and wet bolts. The HD shackles are twice as thick as the OEM shackles. That and the greased bronze bushings instead of Delrin (plastic) bushings in the spring eyes makes for a much stronger and more durable suspension.
NOTE: The grease holes in the wet bolts.
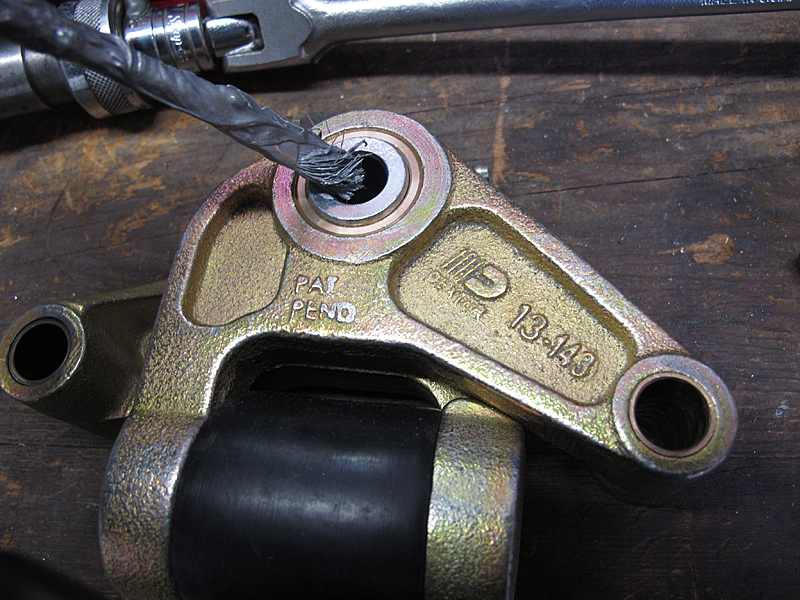
NOTE: I learned a long time ago to remove the zerk fittings and chase the holes with a drill bit to ensure the holes don't have any metal chips in them and that the hole is drilled deep enough for the grease to reach the small hole where it will come out and lube the bronze bushing.
The EZ Flex equalizer is in place and one spring connected.
After both springs have been loosely assembled to the spring hanger & equalizer is the time to reinstall the zerk fittings and shoot some grease in the wet bolts. Occasionally, a bolt may need to be rotated before grease will flow. It's much nicer to discover that now while it's easy to futz with the recalcitrant bolt.
Now it's time to attach the axles to the springs with the U-bolts.
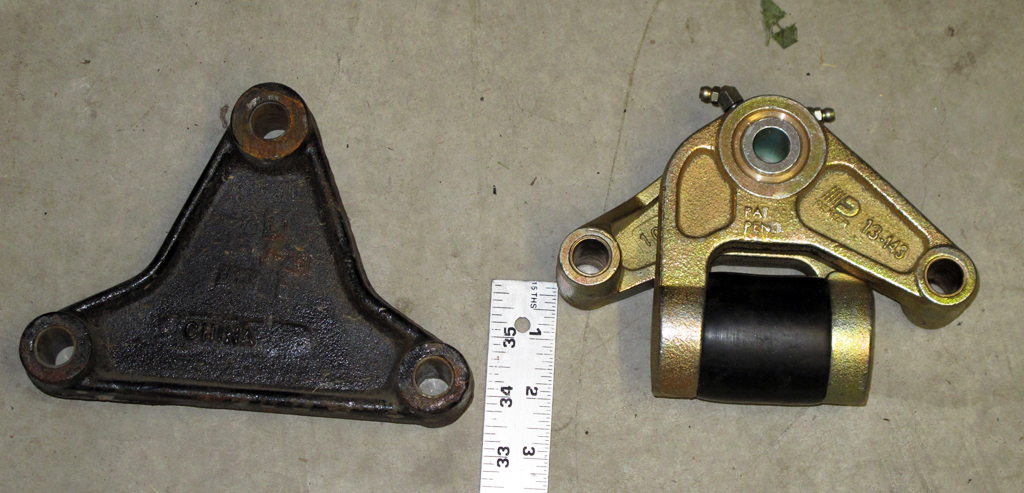
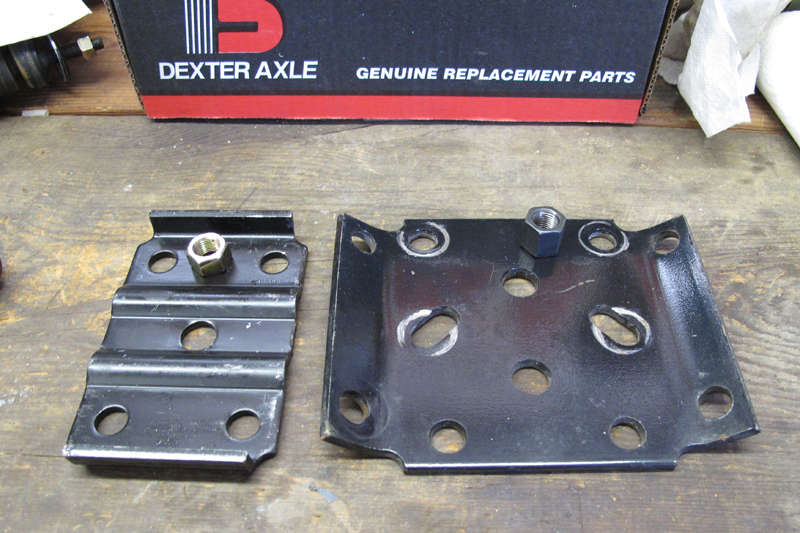
There are two styles of tie plates. The one on the left is what comes in the Dexter EZ Flex kit. The one on the right is the OEM Arctic Fox plate designed for m mounting shock absorbers. Since we will be using our shock absorbers, we'll reuse the OEM tie plate.
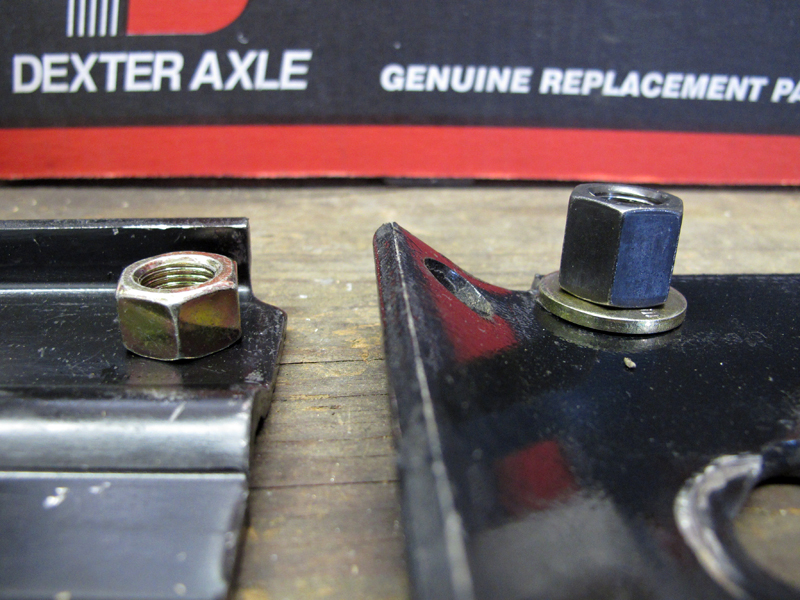
Long Nuts: The Dexter EZ Flex kit also comes with cadmium plated nuts for the U-bolts. Long nuts are preferred because they are inherently self-locking as the bolt threads stretch slightly under torque.
NOTE: U-bolts and their long nuts should always be replaced rather than being re-used. Yes, it's common practice to re-use them, but proper technique is replace them.
Below is a photo of the Dexter-supplied U-bolt nut and a long nut with hardened flat washer.
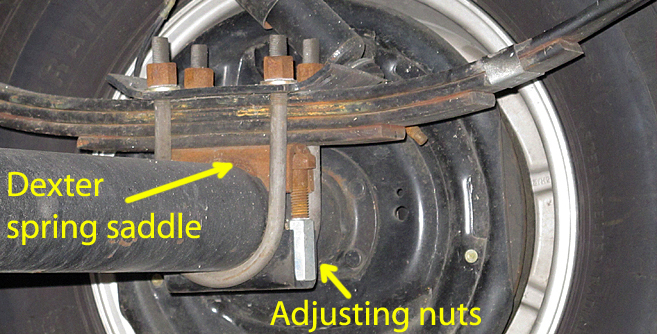
Loosely assemble the axle to spring by first placing the Dexter spring saddle from the kit on top off the axle.
Now set the tie plate on top of the spring pack with the flat side down. Make sure the hole in the tie plate is over the spring center bolt.
Lift the spring axle gently with a jack until everything just touches.
Insert the U-bolts around the axle and through the tie place. Run the nuts down loosely.
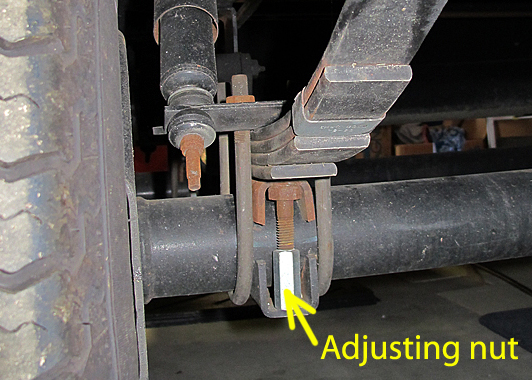
Turn the adjusting nuts on the upper spring saddle bolts until they sit on the lower (welded) spring saddle. Adjust as necessary until both spring saddles are parallel (same distance from lower spring saddle to spring). You may have to loosen/tighten the U-bolt nuts so the upper spring saddle can shift on top of the axle.
Once the upper spring saddle has been properly adjusted, tighten the U-bolt nuts slightly & double-check the position of the upper saddle.
Dexter recommends tack-welding the upper saddle to the axle to prevent it from shifting down the road.
Do not torque the U-bolt nuts until all four corners have been completed - you may need to shift the axles around a bit to reassemble the second side and that's a lot easier if the U-bolts aren't tight.
REPEAT for each of the other three corners.
8. Torque U-bolts
Torque the axle U-bolts to specification.
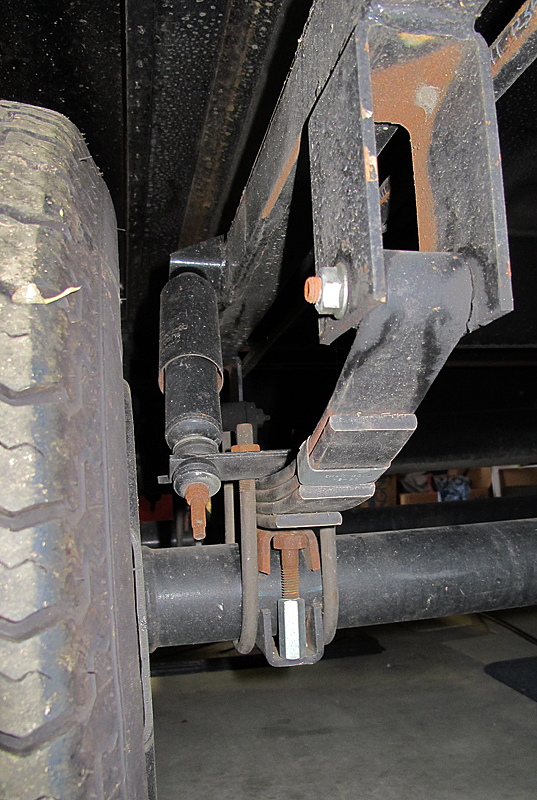
9. Shock Absorbers
Shock Absorbers: The shock absorbers will not fit after the axles have been flipped without installing new mounting brackets on the frame.
The tie plates were mounted under the axles when the axles were on top of the springs. Now those positions are reversed and the shocks don't line up at all. The solution is simple, fortunately. Buy 4 Dexter #033-029-00 & weld them to the frame. We positioned each shock mount by inserting a shock and holding it against the frame in what looked like the place while the welder tacked it in place. Don't forget that the suspension is hanging & will come up a few inches when the trailer is back on its wheels.
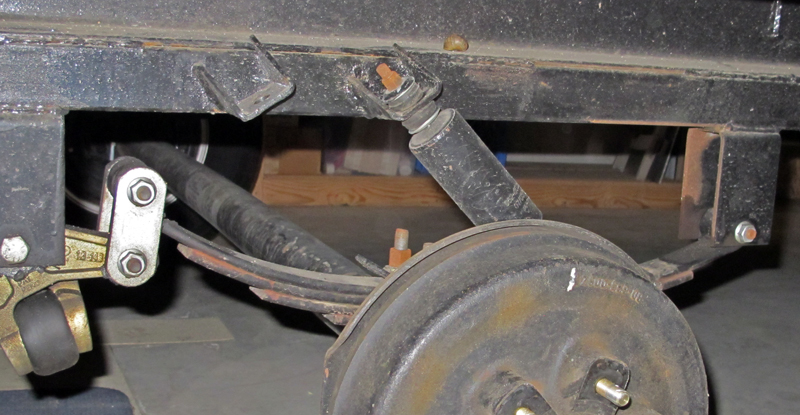
Another view of the relocated shocks mounted to the tie plate on top of the axle.
t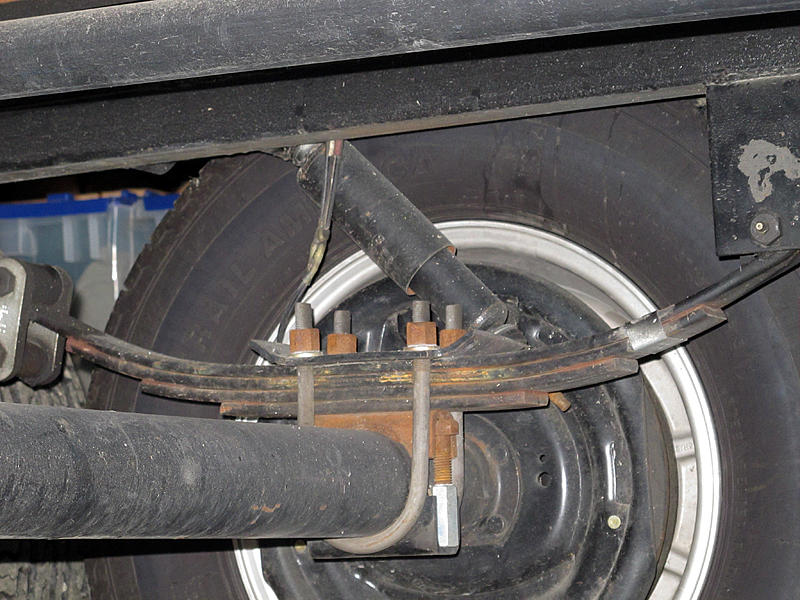
A final view of the shock mounting.
10. Re-install Wheels & Lower to Ground
Re-install the wheels. Torque wheels nuts to specifications. Don't forget to re-torque after 50 miles and occasionally after that.
You may have to lift the axles slightly to get the wheels back on. Never lift the axles with a jack against the axle tube - the tubes are very easy to bend. Likewise, never try to lift a loaded axle with a jack - lift the trailer at the frame. That said, it's OK to lift the unloaded axle an inch or two at the lower spring saddle so you can get the wheels back on.
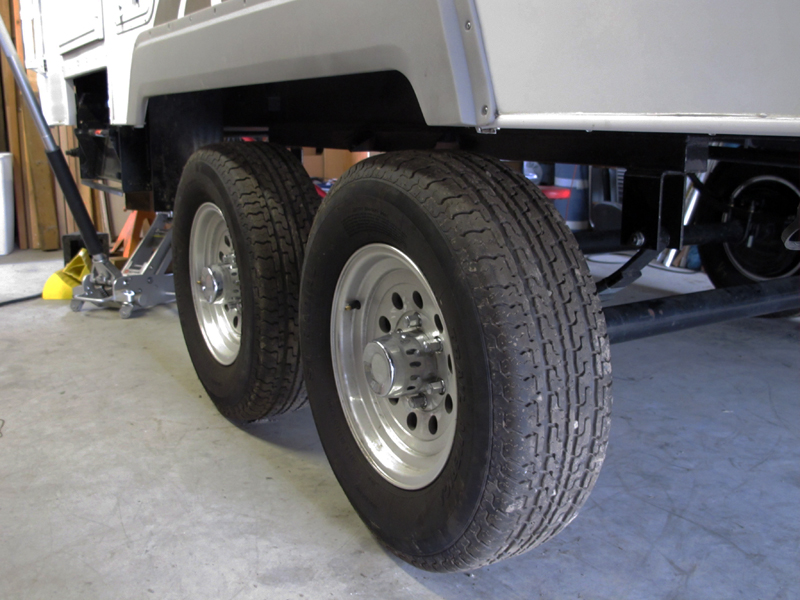
Lift the trailer off the jack stands, remove the jack stands and lower the trailer back to the ground.
11. Road Test and Inspect
Always inspect your work thoroughly after road testing.
12. Enjoy your RV!
Back to the Top