
TPMS - Tire Pressure Monitoring System
We had a Doran RV360 TPMS from our Chevy that we wanted to install in the new Dodge. In the Chevy, the display was mounted on the driver's sunvisor with Velcro to a small aluminum plate I had glued & screwed to the upper surface of the sunvisor. That installation had a few glitches we wanted to avoid in the Dodge. First, it meant the antenna was horizontal so the system lost communications with one of the trailer tire sensors regularly. Second, it protruded quite a bit so the visor didn't fit very closely to the roof of the truck. Third, it didn't look at professional as I wanted it to look in the Dodge. So this is what we did . . .
The Doran 360RV installation in the Chevy 2500HD. The black gismo is an extra backup camera display we got from Costco - VERY grainy picture.
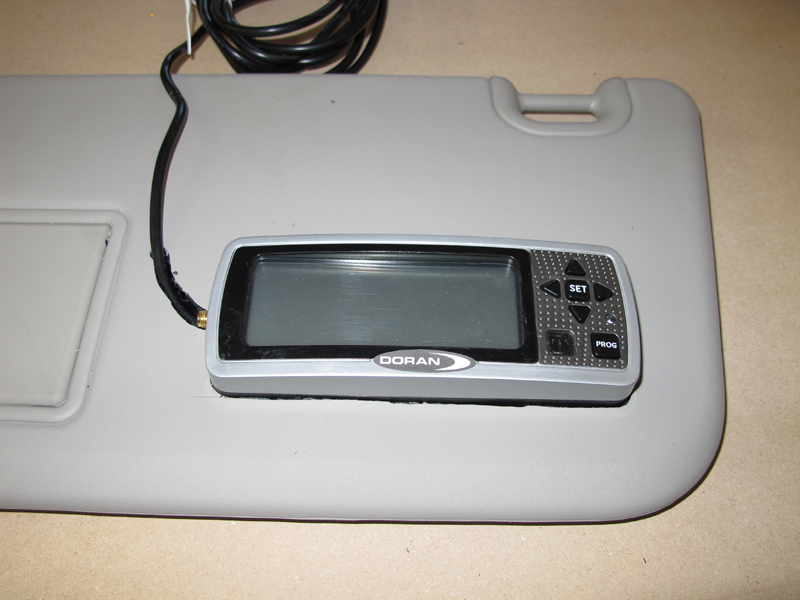
The Doran 360RV TPMS includes a display in the cab and sensors on each wheel. The display normally shows "ON" as in the photo above, however if you press one of the arrow buttons, it will select an individual tire pressure to display. Pressing more arrow buttons changed the tire pressure indicated on the display. It takes less than ten seconds to check the tire pressure in each wheel.
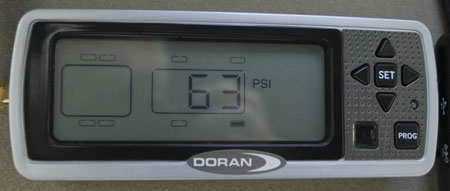
Note how the display in the photo above shows the truck and trailer (truck on the right). When we unhitch it takes just a few seconds to tell the system to only look for the sensors on the truck so the display will only show the truck image and not give a missing sensor warning. If I forget to tell the system I unhitched, CJ is quick to remind me when the audible warning sounds.
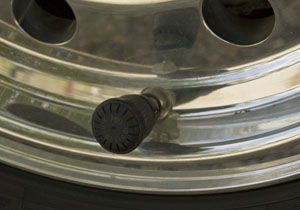
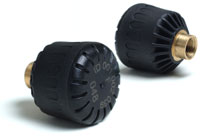
The sensors are extremely light and incorporate a simple locking device intended to keep the honest folks honest. Like most locking devices, it won't stop someone that's determined to have your sensors. Like most TPMS systems, the sensors must be replaced when the batteries are kaput.

Installation
While it is possible to power the Doran 360RV with an auxiliary power outlet (cigar lighter) that technique isn't very elegant & has technical disadvantages such as delaying startup. Naturally, we hardwired the TPMS into the truck.
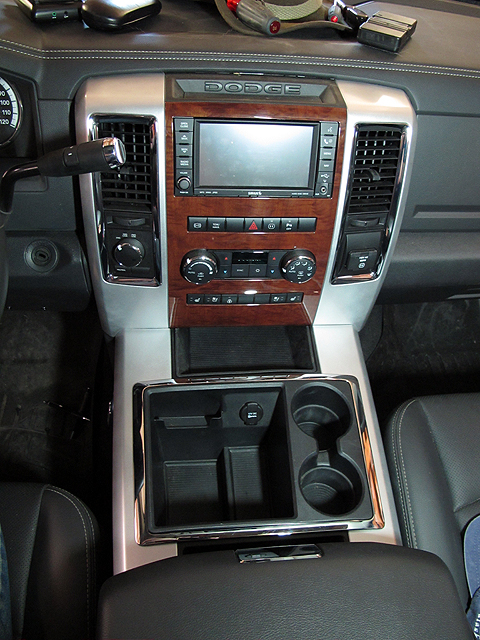
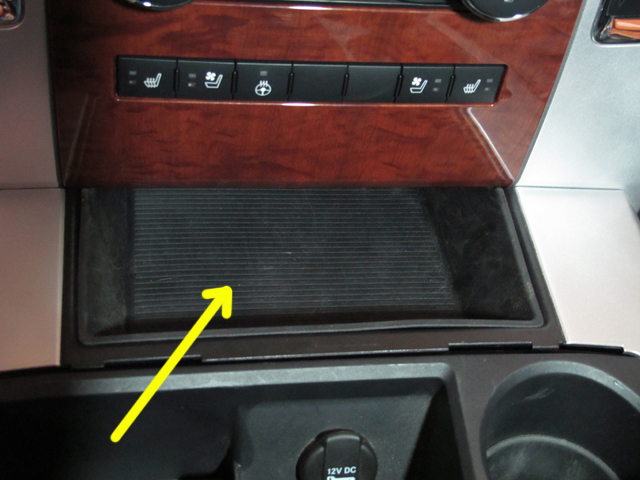
Start by carefully lifting the chrome beauty ring around the cupholder portion of the console. It just snaps into place, so it's easy to remove.
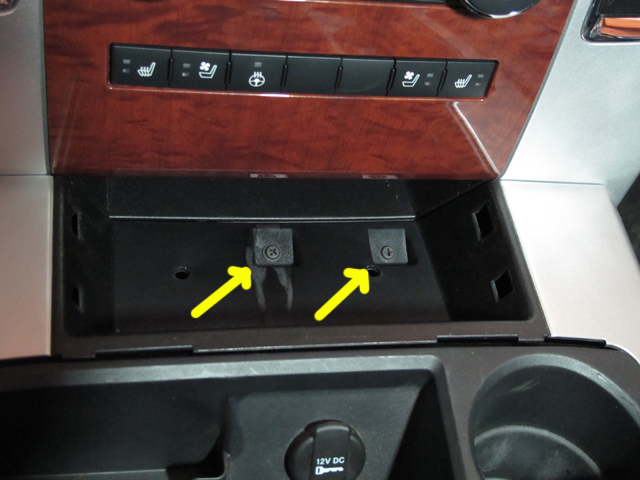

This is what the underside of the console cover looks like just in case you were dying to know. :-)
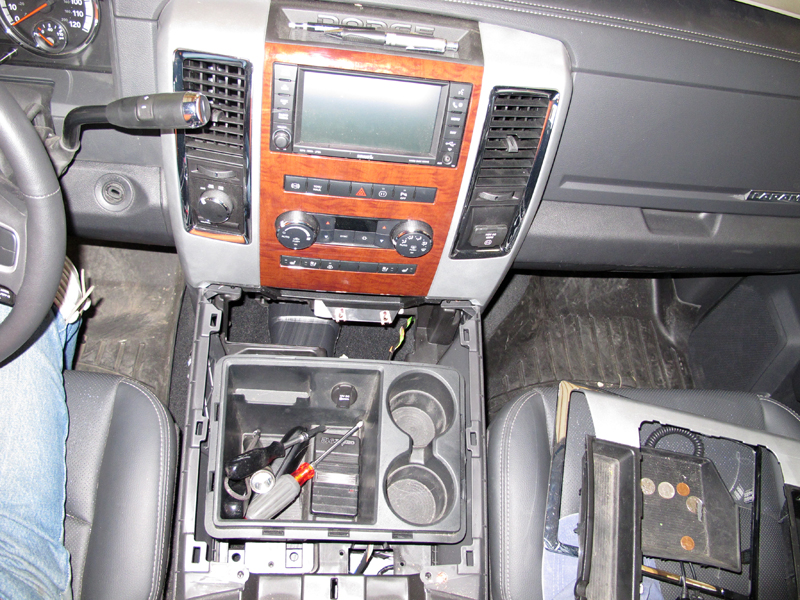
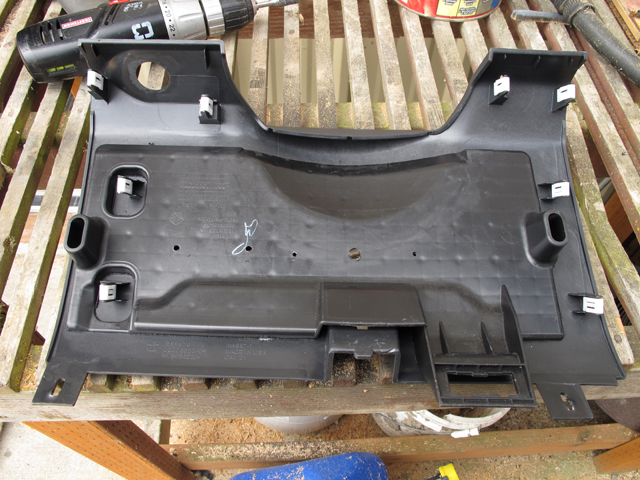
The knee panel looks like this when it's been removed. Note the 4 white plastic snap in retainers on each side and the two slotted screw holes at the bottom.
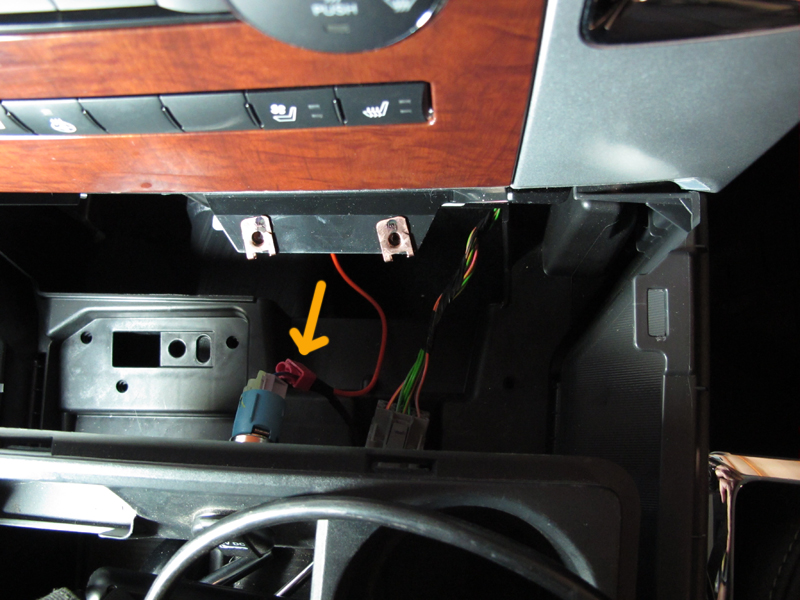
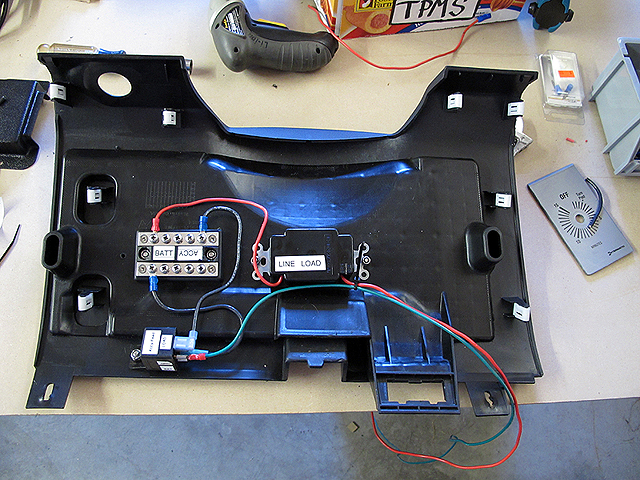
This photo shows the junction block with both battery feeds (always on) and accessory feeds (key on), the switch for the auxiliary fuel tank transfer pump and the relay to power the accessory side of the junction block. In other words, the power from the tap on the power outlet merely triggers the relay so the accessory side of the junction block is powered up. The junction block gets its battery power via a wire through the firewall to the left battery, while the accessory power comes from the relay that's triggered by the power outlet in the console.
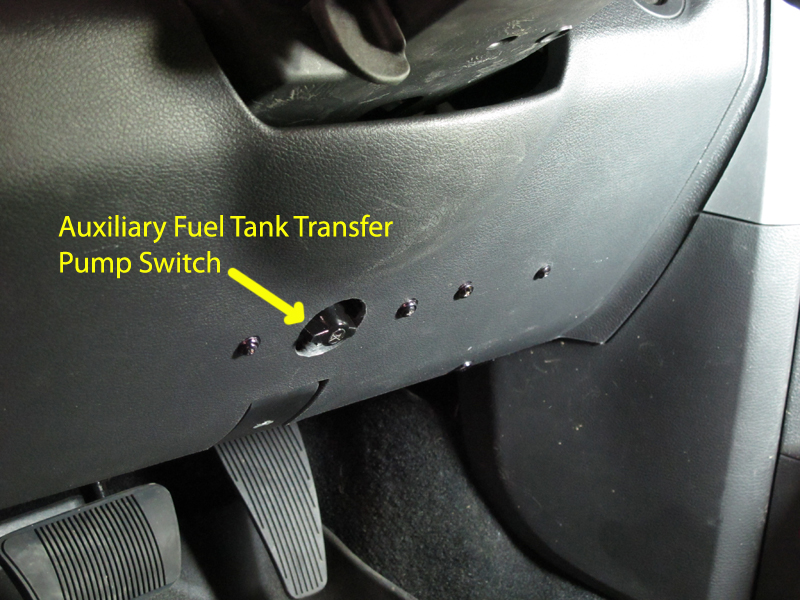
The photo below shows the fuel tank transfer switch & fasteners. Details on the auxiliary fuel tank system can be found here.
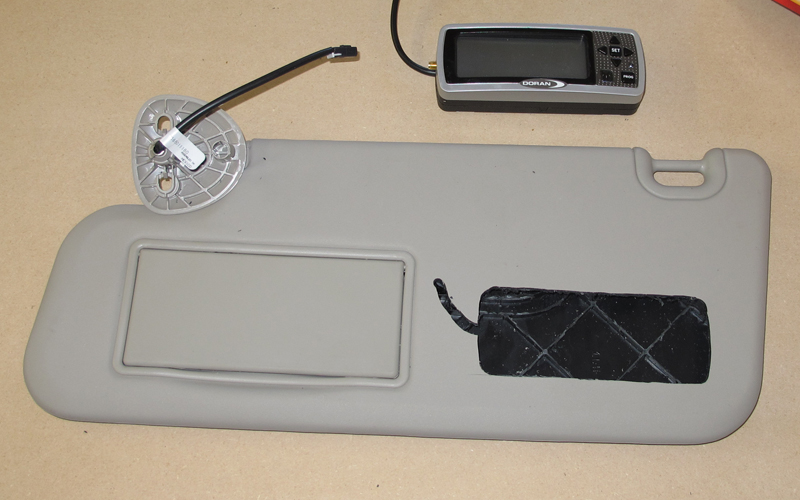
I started by purchasing a new driver's side sunvisor. While it's not necessary to buy a new sunvisor, this lets me remove the system and return the truck to stock to preserve its resale value. FYI, the new sunvisor part number for the Ram is 1HQ29BD1AC and it cost $33.33 online including S/H.
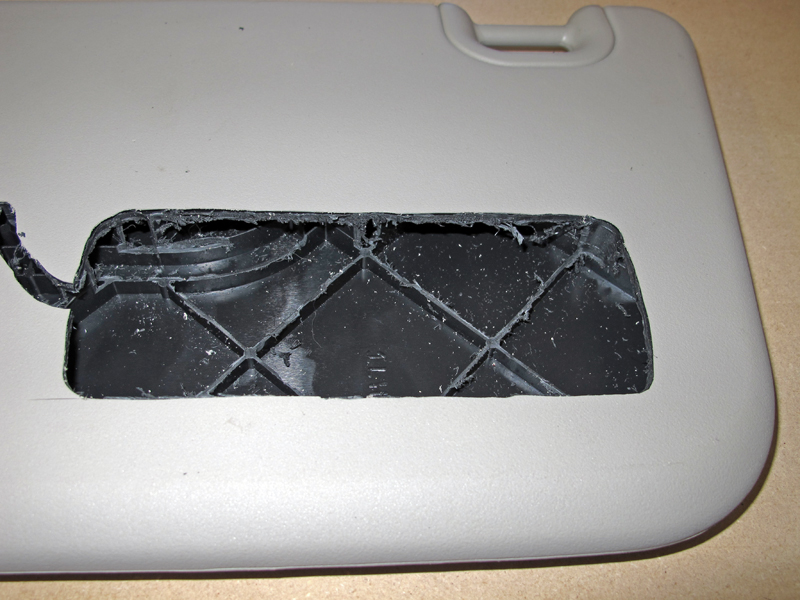
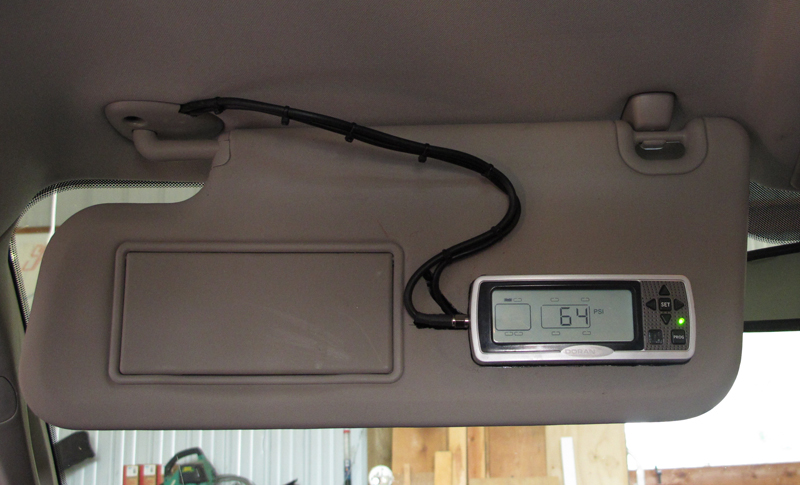
Since the Doran 360RV is about an inch thick and that's enough to mess up the operation of the sunvisor, I recessed the TPMS display into the sunvisor.
First, cover the sunvisor with masking tape to minimize scarring where it will show later. Then, I held the Doran 360RV where I thought it needed to go and then traced the outline of the display and power cable routing. The vinyl covering on the sunvisor is NOT glued to the plastic frame, so the best technique is to cut out the vinyl covering with an Xacto knife & then remove the plastic core with a router. I used a 1/4" router tip for the cable path and a 1/2" tip for the general cutting.
The photo below shows the sunvisor with the core partially removed. I removed all of the core bracing, all the way down to the flat bottom so the Doran is recessed as far as possible.
The photo below shows the Doran 360RV sitting in the partially routed sunvisor. The Doran is held in place with thin Velcro.
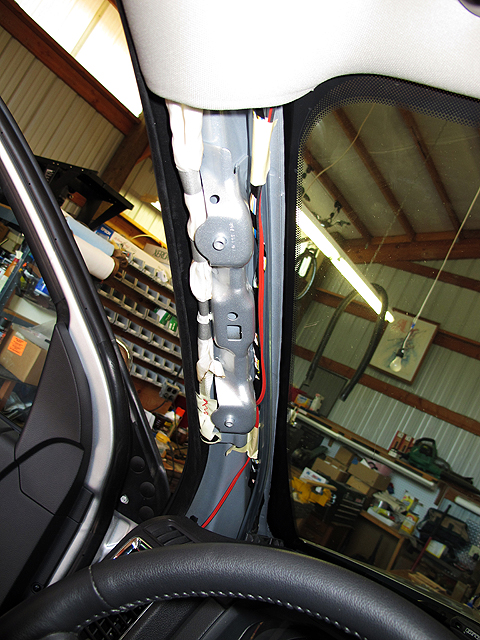
There are two small fastener covers on the driver's A-pillar that are removed by prying with a small screwdriver. Be careful because it's very easy to press on the A-pillar cover in the process and leave scars on the cover. Remove the two screws and pull the A-pillar cover off.
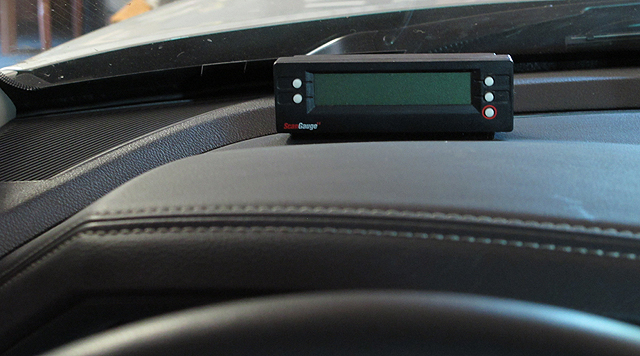
BTW, I mounted my ScanGauge II on top of the dash while I had the A-pillar off. The cable for the ScanGauge II is discreetly tucked away in the dash top and down the hole on its way to the OBD port under the dash.
Cut a small notch in the sunvisor mount for the TPMS cable and install the sunvisor with the TPMS power cable routed through the hole in the headliner to the wiring channel in the A-pillar. There might be a bit of an issue with getting the clocking of the cable at the sunvisor mount correct, but the rest is easy.
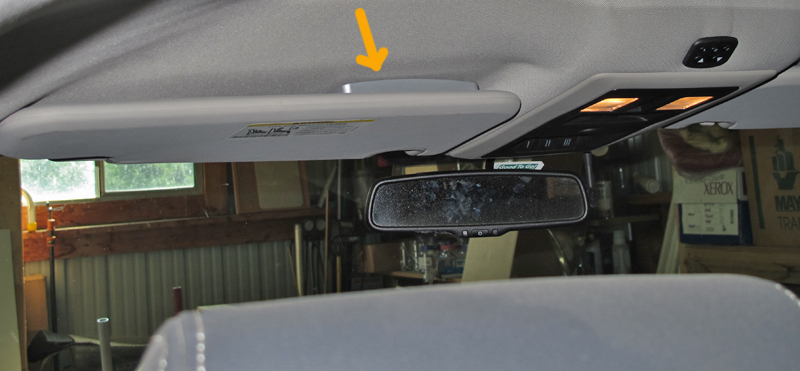
The photo below shows the system. Note the antenna cable I used to mount the antenna remotely - it's on the right side of the rear view mirror with the tip held in place with a spot of Velcro. The cables might look prettier if they were covered with a light grey conduit but that might create more problems than it would solve. Another solution would be to paint the exposed cables.

But, when the sunvisor is up like it usually is for us folks that live in the Pacific Northwest, the TPMS display is hardly visible.
FYI, I remove the sensors from the trailer during the off season to maximize their battery life.
Last updated: 10/07/2010
© Steve Rankin 2010